
Animations with SwiftUI
2020-05-21
- Introduction
- Environment
- Basic animations in SwiftUI
- Transitions
- Springs
- Animatable
- Other ways to make animations
- Conclusions
- References
Introduction
SwiftUI brings an easier way to write UI code across all Apple platforms. As a bonus, it also has a new way to animate state transitions. If you are used to UIView animations, you may find them easier to write and understand. If you're just starting to learn SwiftUI, congratulations! This tutorial will allow you easyIn. It's an animation joke! 🙂
In this tutorial, you'll learn the basics of SwiftUI animation, including:
- the animation modifier.
- withAnimation, the method that allows you to animate state changes.
- custom animations in SwiftUI
Environment
This tutorial is written using the following environment:
- Hardware: MacBook Pro 15' (2.5 GHz Intel Core i7, 16GB DDR3, mid-2015)
- Operating system: macOS Catalina 10.15
- Software versions:
- Xcode: 11
- iOS SDK: 13.4
It is important to know that to try SwiftUI you need to install Mac OS Catalina 10.15 and Xcode 11.
Basic animations in SwiftUI
To add animations, the first thing you need is something to animate. So to start, you need to create a state change that triggers a UI refresh. You can add the .animation modifier to any chain of modifiers that change the view's properties. The important thing here is to change the value after the view appears. This can be done with the .onAppear modifier.
Text("\(character.name ?? "")")
.scaleEffect(self.animationStarted ? 1 : 5)
.animation(.default).onAppear{
   self.animationStarted = true
}
After the scaleEffect modifier add the following *.animation(.default) modifier.*This adds a default animation to the scale effect.
# Animation Timing
The animation modifier .animation(_ 🙂 takes a parameter of type Animation. There are several options you can use for an animation. The basic ones are simple time curves that describe how the speed of the animation changes over the duration. All options modify the attributes, smoothly interpolating between the start and end values.
You have the following options:
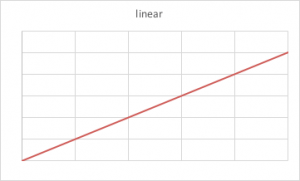
- .linear: Transites the attribute from the start value to the end value evenly over time. This is a good timing curve for looping animations in SwiftUI, but it doesn't look as natural as other options.
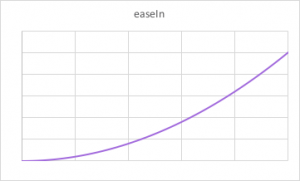
- .easeIn: An animation starts slowly and increases speed over time. Used for animations that start from a rest point and end off the screen.
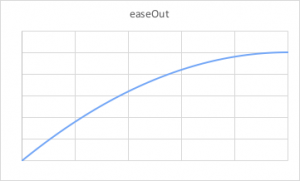
- .easeOut: Animations start fast and end slow. It's good for animating something reaching a stable state or final position.
 *
*
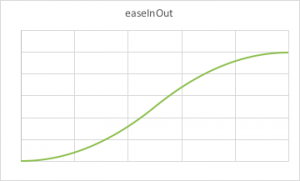
- .easeInOut: combines ease and speed. It's cool for animations that start at a stable point and end at another equilibrium. It can be used in most cases. That's why it is the time curve used by .default.
- .timingCurve: allows you to specify a custom timing curve. It is rarely necessary and is outside the scope of this tutorial.
Most of the time, .default will be good enough for your needs. If you need something else, you can change it to one of these and they will give you a little extra refinement.
# Play with time
If you have trouble seeing subtle differences, you can slow down the animation by making it take longer. Replace the animation modifier with:
.animation(.easeIn(duration: 5))
Specifying a longer duration will make the time curve more noticeable. An advantage of building and running in the simulator instead of the SwiftUI preview window is that you can enable the Debug ▸ Slow Animations flag. This will dramatically slow down any animation so you can see subtle differences more clearly. This way, you don't have to add additional duration parameters. You can use a few other parameters to control the timing of an animation, in addition to the timing curve and duration. First, the speed:
Animation.easeInOut.speed(0.1)
In addition to speed, you can also add delay:
Animation.easeInOut.delay(1)
The animation now has a one second delay. Delay is most useful when animating multiple properties or objects at once.
Finally, you can use modifiers to repeat an animation. Change the animation to:
Animation.easeInOut.repeatForever(autoreverses: true)
Now the animation will be permanent. You can also use repeatCount (autoreverses 🙂 to repeat the animation a limited number of times.
# Simultaneous Animations in SwiftUI
.animation is a modifier that is added to a SwiftUI view like any other. If a view has multiple changing attributes, a single animation can be applied to all of them. Add the following rotation effect by placing it between the Image and scaleEffect lines:
Text("\(character.name ?? "")")
 .scaleEffect(self.animationStarted ? 1 : 5)
 .rotationEffect(.degrees(self.animationStarted ? 0 : -50))
 .animation(.default)
 .onAppear{
    self.animationStarted = true
}
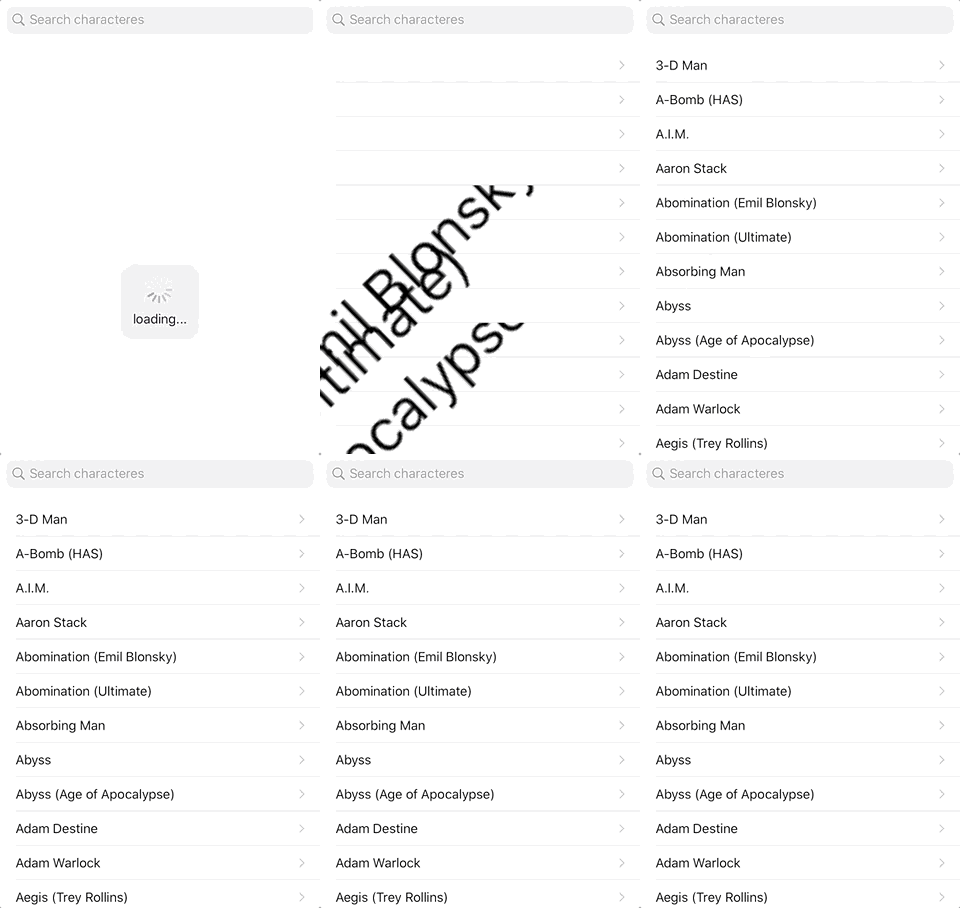
This adds a small rotation to the text while decreasing the size of the text. The two animations run together since you added the .animation modifier at the end.
Of course, you can specify separate animations for each attribute. For example, add the following modifier after the rotation effect modifier:
Text("\(character.name ?? "")")
   .rotationEffect(.degrees(self.animationStarted ? 0 : -50))
   .animation(.easeOut(duration: 1))
   .scaleEffect(self.animationStarted ? 1 : 5)
   .animation(.default)
   .onAppear{
       self.animationStarted = true
 }
This gives the rotation a one-second animation, so you'll notice that the rotation ends a little later compared to the scaling effect. Next, you can change the line with .animation(.default) to:
.animation(Animation.default.delay(1))
This delays the animation by one second, so scaling starts after the rotation finishes.
Finally, you can choose not to animate a particular attribute change by specifying nil for the animation.
.animation(nil)
# Animating state changes
But if you need something more sophisticated and complicated you can use a withAnimation method. This way, you can animate any state transition with a simple animation block. Replace the content of the button action block with:
Text("\(character.name ?? "")").frame(maxWidth: .infinity, alignment: Alignment.leading)
.rotationEffect(.degrees(self.animationStarted ? 0 : -50))
.scaleEffect(self.animationStarted ? 1 : 5)
.onAppear{
    withAnimation {
        self.animationStarted = true
  }
}
The withAnimation method explicitly tells SwiftUI what to animate. In this case, it animates the change of self.animationStarted and any views that have attributes that depend on it. You can also choose an animation specific to the explicit animation block. Using withAnimation like this:
withAnimation(.easeIn(duration: 2))
This now uses a simplified animation with a duration of two seconds instead of the default.
Transitions in SwiftUI
A transition defines how a view is inserted or removed. To see how it works, you have to add the .transition(.customTransition) modifier:
Image(“driving”)
.transition(AnyTransition.slide) //NO FUNCIONA!!
But that's okay, we don't see any effects.
Text("\(character.name ?? "")").frame(alignment: Alignment.leading)
.transition(.slide)
.animation(.default)
Nothing happens either. Are we missing something?
It is important to note that a view with transition and animation modifiers will still not take effect.
if self.animationStarted {
      Text("\(character.name ?? "")").frame(alignment: Alignment.leading)
      .transition(.slide)
      .animation(.default)
}
You have to add the view that has the transition to the screen (and optionally remove it from the screen) to see the effect.
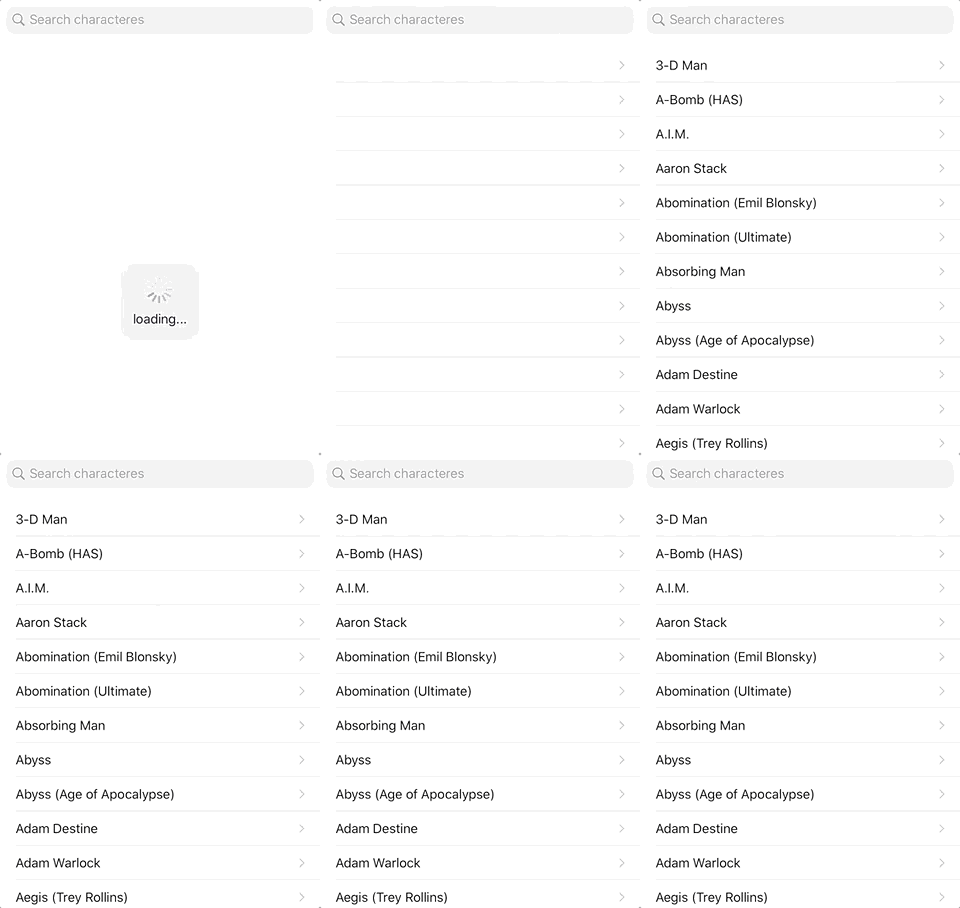
Now, we do see the effect. The text slides from the left and goes to the right. Transitions are of type AnyTransition. SwiftUI comes with some default transitions:
- .slide: you've already seen this one in action: slide the view from the side.
- .opacity: This transition fades the view in and out.
- .scale: Animates when zooming in or out.
- .move: This is like a slide, except you can specify the border.
- .offset: moves the view in one direction.
Go ahead and try some of these transitions to get an idea of how they work.
# Combining transitions
You can also combine transitions to compose your own custom effects. At the top of ContentView.swift, add this extension:
extension AnyTransition {
  static var customTransition: AnyTransition {
    let transition = AnyTransition.move(edge: .top)
      .combined(with: .scale(scale: 0.2, anchor: .topTrailing))
      .combined(with: .opacity)
    return transition
  }
}
This combines three transitions: a move from the top edge, a 20% scale anchored to the top corner, and an opacity fade effect. To use it, change the transition line to:
.transition(.customTransition)
The combined effect is as if the text enters and exits from top to bottom.
# Asynchronous Transitions
If you want, you can also make its entry transition different from its exit transition.
static var customTransition: AnyTransition {
  let insertion = AnyTransition.move(edge: .top)
    .combined(with: .scale(scale: 0.2, anchor: .topTrailing))
    .combined(with: .opacity)
  let removal = AnyTransition.move(edge: .top)
  return .asymmetric(insertion: insertion, removal: removal)
}
In this case we maintain the tilt in the insert, but now the view leaves the screen moving towards the top.
Springs
The predefined animations aren't very perfect yet, so you'll need to add a little more pizzazz. Spring animations allow you to add a little bounce and shake to make your views feel alive.
func animation(index: Double) -> Animation {
  return Animation.spring(dampingFraction: 0.5)
}
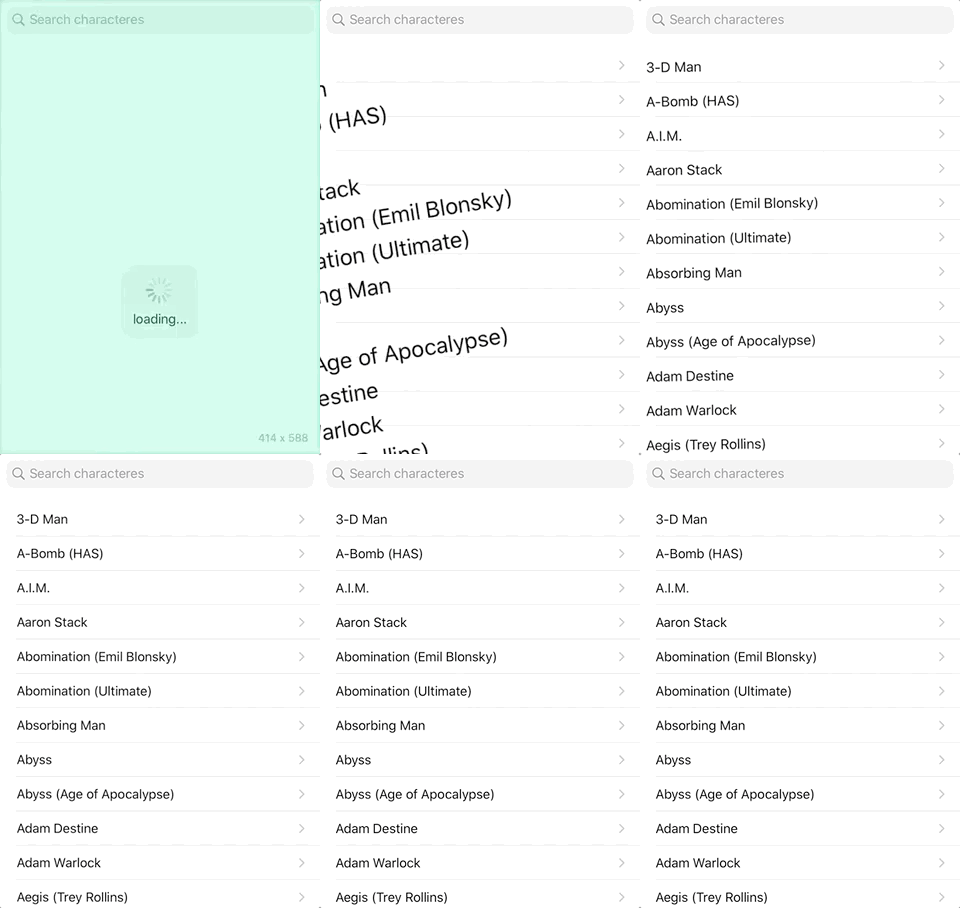
Like everything else in SwiftUI, there are some built-in options for springs:
- spring(): Default behavior. This is a good starting point.
- spring(response:dampingFraction:blendDuration): A spring animation with more options to adjust its behavior.
- interpolatingSpring(mass:stiffness:damping:initialVelocity:): A highly customizable spring based on the physical model.
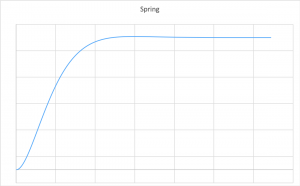
Spring animations in SwiftUI use the real-world physics of springs as a base. Imagine, a hanging spring coil with a heavy block attached to the end. If that block has a large mass, releasing the spring will cause a large displacement as it falls, causing it to bounce more and more. A stiffer spring has the opposite effect: the stiffer the spring, the farther it will travel. Increasing damping is like increasing friction: it will result in less travel and a shorter rebound period. The initial speed sets the speed of the animation: a faster speed will move the view more and cause it to bounce more.
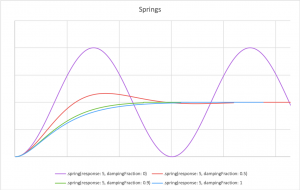
It can be difficult to understand how the animation will actually work. That's why it's useful to play with the parameters to get a good animation.
This is also why there is a spring(response: dampingFraction: blendDuration) method, which is the easiest way to write a Spring animation. Under the hood, it still uses the physical model, but has fewer parameters.
The dampingFraction parameter controls how long the view will bounce. If the dampingFraction is 0, it is an undamped system, meaning it will bounce forever. A dampingFraction value that is more than 1 will not jump at all. If you're using a spring, you'll generally choose a value somewhere between 0 and 1. Larger values will slow down faster.
The response parameter is the amount of time to complete a single oscillation. This will control how long the animation lasts. These two values work together to adjust where and how fast and how often the view will bounce. BlendDuration affects the animation if you change the response or combine multiple springs.
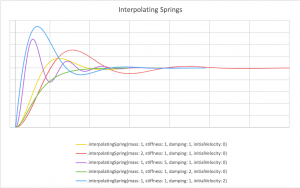
Now that you have a better idea of how the springs work, take a moment to play with the parameters. One thing that's good to do when you're animating a bunch of relatively independent views is to give them slightly different timings. This helps your animation feel more alive. For example, you can adjust the delay of each animation depending on the index of each view.
func animation(index: Double) -> Animation {
  return Animation
    .spring(response: 0.55, dampingFraction: 0.45, blendDuration: 0)
    .speed(2)
    .delay(0.075 * index)
}
Animatable
Behind all SwiftUI animations, there is a protocol called Animatable. We'll get into the details later, but mainly, it involves having a computed property with a type that implements the VectorArithmetic protocol. This makes it possible for the framework to interpolate the values.
When animating a view, SwiftUI is actually regenerating the view many times and modifying the animation parameter each time. In this way it goes progressively from the origin value to the final value.
You can do this using a custom modifier, a GeometryEffect. Geometry effects describe an animation that modifies the position, shape, or size of a view.
func effectValue(size: CGSize) -> ProjectionTransform
Let's say the method is called SkewEffect, to apply it to a view, you have to do it like this:
Text("Hello").modifier(SkewEfect(skewValue: 0.5))
The text ("Hello") will be transformed with the array created by the SkewEfect.effectValue() method. As simple as that. Keep in mind that the changes will affect the view, but without affecting the layout of its ancestors or descendants.
Because GeometryEffect also implements the Animatable protocol, you can add an animatableData property, and that's it, you have an animatable effect.
You may not know it, but you're probably using GeometryEffect all the time. If you ever used .offset(), you were actually using GeometryEffect. Let me show you how it is implemented:
public extension View {
    func offset(x: CGFloat, y: CGFloat) -> some View {
        return modifier(_OffsetEffect(offset: CGSize(width: x, height: y)))
    }

    func offset(_ offset: CGSize) -> some View {
        return modifier(_OffsetEffect(offset: offset))
    }
}

struct _OffsetEffect: GeometryEffect {
    var offset: CGSize

    var animatableData: CGSize.AnimatableData {
        get { CGSize.AnimatableData(offset.width, offset.height) }
        set { offset = CGSize(width: newValue.first, height: newValue.second) }
    }

    public func effectValue(size: CGSize) -> ProjectionTransform {
        return ProjectionTransform(CGAffineTransform(translationX: offset.width, y: offset.height))
    }
}
This GeometryEffect moves your view a distance. It does this through the effectValue (size:) method of GeometryEffect. This method returns a ProjectionTransform, which is a coordinate transformation. Animatable data can be any value of type that implements VectorArithmetic, meaning it can be interpolated between a start value and an end value.
Other ways to do animations in SwiftUI
The types of animation you've seen so far happen implicitly or explicitly when a view is changed due to a state change. You can also animate a view by explicitly controlling a view's attributes. For example, you can make a change to the offset of a view to move it from one location to another.
You can spice up the list by giving it a CoverFlow-like interface using a rotation3D effect.
VStack {
                GeometryReader{ viewGeometry in
                    ScrollView(.horizontal, showsIndicators: false){
                        GeometryReader{ imageGeometry in
                            AsyncImage(
                                url: self.character?.thumbnailUrl(),
                                cache: self.cache,
                                placeholder: LoadingView()
                            )
                            .frame(width: 300, height: 300)
                            .clipShape(Circle())
                            .shadow(radius: 10)
                            .padding(15)
                            .rotation3DEffect(.degrees(Double(imageGeometry.frame(in: .global).midX - viewGeometry.size.width / 2)),
                             axis: (x: 0, y: 1, z: 0))
                        }
                    }
                }
This applies a rotation effect along the y axis.
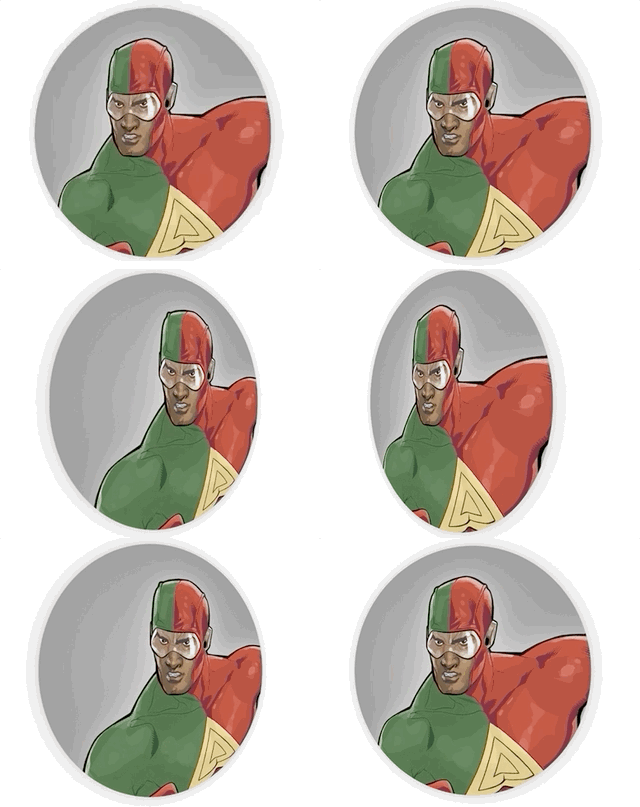
By combining GeometryReader and an effect such as projectionEffect, transformEffect, scaleEffect, or rotationEffect, you can modify the position and shape of a view as its position on the screen changes.
Conclusions
You just touched on just a few things you can do with animations in SwiftUI. Fortunately, adding a .animation (.default) or .animation (.spring()) will usually get you pretty far. But if you need something more elaborate, animations in Swift are worlds away! With the help of GeometryEffect, GeometryReader or even Metal you can do almost anything.