
Getting started with SwiftUI
2020-05-06
- Introduction
- Environment
- First steps with SwiftUI
- Basic interface elements
- Using @State and @Binding
- Conclusions
- References
Introduction
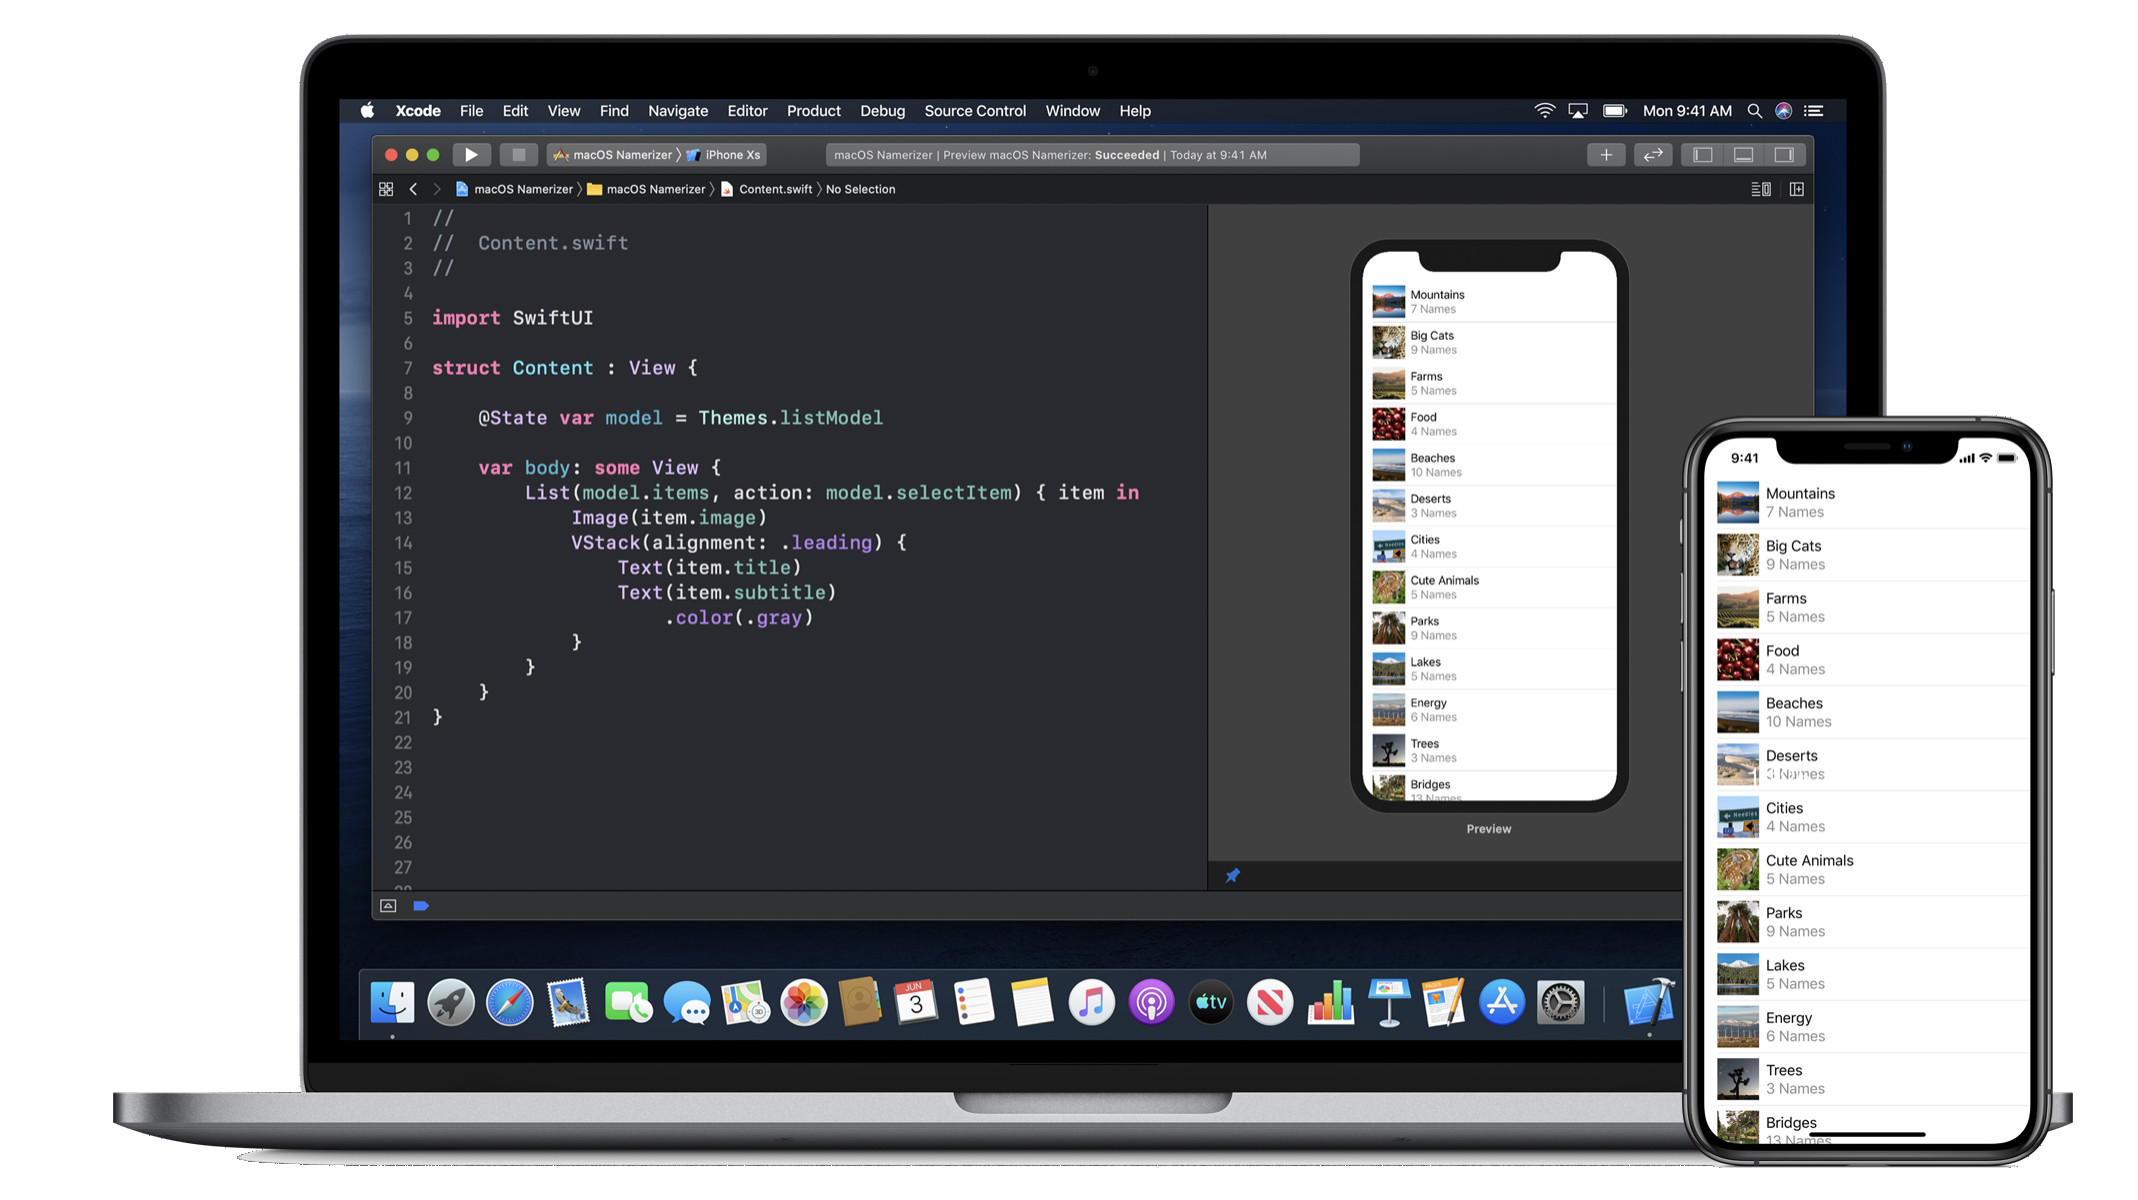
This tutorial will help us take the first steps with SwiftUI. It is a new, declarative and simple way to create user interfaces on all Apple platforms using only Swift. You can create user interfaces for any Apple device using just one SwiftUI API. With a declarative Swift syntax that's easy to read and natural to write, SwiftUI lets you keep your code and design perfectly in sync with Xcode's new design tools.
Also SwiftUI allows you to bypass the Interface Builder (IB) without having to write detailed step-by-step instructions to design your user interface. IB and Xcode were separate applications before Or you dislike String identifiers for segues or table view cells that you have to use in your code, but Xcode can't check it because they are of type String.
And yes, it is faster and easier to design a new UI in a WYSIWYG editor, it is much more efficient to copy or edit the UI when it is written in declarative code. You can preview a side-by-side SwiftUI view with its code; a change on one side will update the other side, so they are always in sync. There are no "string" type identifiers to make a mistake. And it's code, but much less than you'd write for UIKit, so it's easier to understand, edit, and debug.
SwiftUI is not a replacement for UIKit: like Swift and Objective-C, you can use both in the same app. You won't be able to run SwiftUI iOS apps on macOS. For that you need to use Catalyst (an Apple framework). But, SwiftUI APIs are consistent across platforms, so it will be easier to develop the same app on multiple platforms using the same source code on each. The bad thing is that SwiftUI is only compatible with iOS 13, but over time this disadvantage decreases.
Environment
This tutorial is written using the following environment:
- Hardware: MacBook Pro 15' (2.5 GHz Intel Core i7, 16GB DDR3, mid-2015)
- Operating system: macOS Catalina 10.15
- Software versions:
- Xcode: 11
- iOS SDK: 13.4
It is important to know that to try SwiftUI you need to install Mac OS Catalina 10.15 and Xcode 11.
Getting started with SwiftUI
While storyboards and
SwiftUI sweeps away all that in several important ways:
There's a new declarative UI structure that defines how our designs look and work. Updating the UI preview automatically generates new Swift code, and changing the Swift code updates the UI preview. Any bindings in Swift, for example outlets and actions, are now effectively checked at compile time, so there is no more risk of the UI failing unexpectedly at runtime. Although it uses UIKit and AppKit controls underneath, it sits on top of them, making the underlying UI framework an implementation detail rather than something we're specifically interested in.
To better understand the new world of SwiftUI, we are going to create a very simple project. In Xcode 11 beta, create a new Xcode project (Shift-Command-N), select iOS App Single View App, name the project whatever you want, then check the “Use SwiftUI” box:
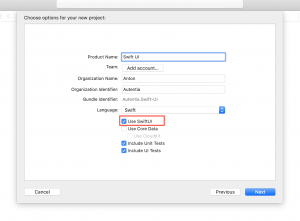
In the project browser, open the SwiftUI group to see what it has: The old AppDelegate.swift is now split into AppDelegate.swift and SceneDelegate.swift. SceneDelegate is not specific to SwiftUI, but this line is:
window.rootViewController = UIHostingController(rootView: ContentView())
UIHostingController allows you to integrate SwiftUI views into an existing application. When the application starts, the window displays an instance of ContentView, which is defined in ContentView.swift. It is a structure that conforms to the View protocol.
struct ContentView: View {
  var body: some View {
    Text("Hello World")
  }
}
This code declares that the body of the ContentView contains a text view that displays Hello World. Below in the DEBUG block, ContentView_Previews produces a view that contains an instance of ContentView.
#if DEBUG
struct ContentView_Previews: PreviewProvider {
  static var previews: some View {
    ContentView()
  }
}
#endif
This is where you can specify sample data for the preview. But where is this preview? Click “Resume” and wait a moment to see the preview:
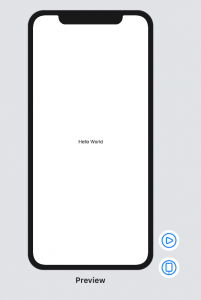
The only file not listed is Main.storyboard - it will create your UI in SwiftUI code, keeping an eye on the preview to see what it looks like. But don't worry, you won't be writing hundreds of lines of code to create views! SwiftUI is declarative: you just declare the views you want and SwiftUI turns your declarations into efficient code that gets the job done. Apple encourages you to create as many views as you need, to keep your code easy to read and maintain. Reusable, parameterized views are especially recommended: it's like extracting code into a function, and it's easy to do with two clicks.
The basic elements of SwiftUI
Let's add more visual elements to our view. To add more elements to the view we have to use containers like VStack or HStack. They are containers that distribute views vertically or horizontally. The easiest way to add them is to do Command-Click to the only view we have, which is Text**. **Then the menu will appear that allows us to easily integrate our only view to HStack or VStack.
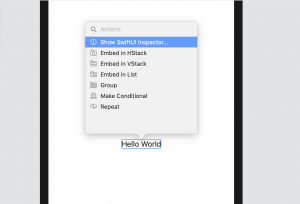
To add more views we have to press the + button at the top right. We can choose between Text, TextField, DatePicker, Slider, Toggle and, of course, Button. We can also edit the properties of each view through the same menu, clicking "Show SwiftUI Inspector". Each view has its set of properties and to modify them you have to add modifiers. For example, font, color, alignment etc. It can also be done by editing the code.
struct ContentView : View {

    var body: some View {
        HStack {
            Text("Hello World")
                .fontWeight(.light)
                .foregroundColor(Color.red)
                .multilineTextAlignment(.center)
        }
    }
}
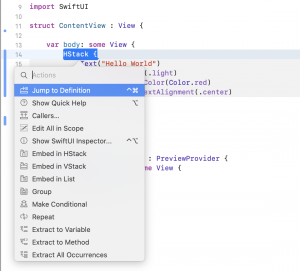
You can also do Command-Click in the code on an element and you will see the menu that helps you integrate your view within the containers, get quick help or even do some refactoring. This menu is very useful and helps a lot, especially at the beginning.
We add Button and center our views. In addition, we have also added the spacing modifier to add space between the elements of our stack.
struct ContentView : View {

    var body: some View {
        VStack(alignment: .center, spacing: 10.0) {
            Text("Hello")
            Button(action: {}) {
                Text("Show Alert").foregroundColor(Color.red)
            }
        }
    }
}
What if we want to link our view with another? If we want to create a stack of views like we did before with the NavigationController, we also have to add other declarations. Everything in SwiftUI is done through declarations. At first it may seem very unusual and uncomfortable, but over time you get used to it and it is actually quite easy and fast. It's just another way of doing things.
We need to wrap our VStack container with the views in NavigationView and add an element called NavigationLink. The code is very explanatory and easy to understand. NavigationLink is a button that needs only the destination (another view) and the text. And to demonstrate the title of “the navigation bar” we attach a “navigationBarTitle” modifier.
struct ContentView : View {
    var body: some View {
        NavigationView {
            VStack(alignment: .center, spacing: 10.0) {
                Text("Hello")
                Button(action:{}) {
                    Text("Show Alert")
                        .foregroundColor(Color.red)
                }
                NavigationLink(destination: DetailView()) {
                    Text("Go to Detail View")
                }
            }.navigationBarTitle("Main View")
        }
    }
}
And with only about fifteen lines of code we have navigation between two views, the navigation bar and a button that does nothing 😉
Using property wrappers @State and @Binding
Every view in Swift UI is a structure, so you can add and use “normal” constants and variables in SwiftUI. What if we have views that depend on the values of our variables? How can we synchronize the views and variables? For that you have to use a @State or @Binding variable if the UI should update whenever its value changes. They are "live variables" 😉. With the introduction of Swift 5.1 we now have the property wrapper: a fundamental thing in SwiftUI. The property wrapper is a way to add more functionality to the calculable property. SwiftUI has several types of property wrappers already implemented, but we can always add our own.
The most usable ones are @State, @Binding. They are essential for development in Swift UI.
@State is probably the most used property wrapper in SwiftUI. It is a local variable used to bind the view and the variable. Whenever the value of @State variable is changed, the bound view is updated. Let's look at a simple example.
struct ContentView : View {
    @State var myNumber = 1

    var body: some View {
            VStack(alignment: .center, spacing: 10.0) {
                Text("Number \(myNumber)")
                Button(action: { self.myNumber+=1}) {
                    Text("Add 1")
                        .foregroundColor(Color.red)
                }
        }
    }
}
Every time we press the button the text is updated, because our "Text" view is linked to the @State variable value. Our variable is “the source of truth” of our view.
@Binding
As we learned earlier, property wrappers should always relate to a specific view. But sometimes we want to access a property wrapper from the outside, for example, from child views.
To create such a reference, we use the @Binding property wrapper. If you want to create a binding from a child view to the view containing the State property, simply declare a variable inside the child view and mark it with the @Binding keyword.
struct ChildView: View {

    @Binding var myBinding: String

    var body: some View {
        //...
    }
}
You can then create the binding by initializing the child view with reference to the @State variable using the “$” syntax.
struct ContentView: View {

    @State var myBinding = "Hello"

    var body: some View {
         ChildView(myBinding: $myBinding)
    }

}
The @Binding variable is used the same as @State. For example, when you update the @Binding variable, it also causes @State to change its value, which causes the view to update again as well.
struct ContentView: View {

    @State var myInteger = 1

    var body: some View {
        VStack {
            Text("\(myInteger)")
            OutsourcedButtonView(myInteger: $myInteger)
        }
    }

}

struct OutsourcedButtonView: View {

    @Binding var myInteger: Int

    var body: some View {
        Button(action: {self.myInteger += 1}) {
            Text("Tap me!")
        }
    }
}
In the example above, ContentView contains a variable that contains an integer and some text to display that data. ChildView contains a binding to this variable @State and a button to increase the value of the binding property. When we tap the button, the status data is updated via the link, causing the ContentView to redisplay and finally display the updated number.
Let's do an example that will help us understand how the property wrappers mechanism works.
struct ContentView : View {
    @State private var showingAlert = false
    @State private var name = "Anton"

    var body: some View {
        NavigationView {
                VStack(spacing: 20.0) {
                    ChildView(name: $name, showingAlert: $showingAlert)
                        }.alert(isPresented: $showingAlert) {
                            Alert(title: Text("Important message"),
                            message: Text("Welcome \(name)"),
                            dismissButton: .default(Text("Got it!")))
                        }
                        NavigationLink(destination: DetailView()) {
                            Text("Go to Detail")
                        }
                    }.padding(.all, 10.0)
                    .navigationBarTitle("Main Page")
        }
}

struct ChildView: View {
    @Binding var name : String
    @Binding var showingAlert: Bool

    var body: some View {
        VStack {
            TextField("Placeholder", text: $name)
                .padding(.horizontal, 15.0)
            Button(action: {
                self.showingAlert = true
            }) {
                Text("Show Alert")
                    .foregroundColor(Color.red)
            }
        }
    }
}
Here we have divided our view into two, creating two views: the parental one and the daughter one. We create the variables "showingAlert" and "name" with the @State property wrapper and pass them to the subsidiary view, but within it we need to use the @Binding property wrapper. @State properties are “local” and @Binding properties are used to bind two different views. To create a link (binding) between the property wrapper and another view, the “$” symbol is used. It is like a reference to the value of this property that creates a link (binding) to pass it to other views.
With the help of property wrappers we can divide our logic into different parts. It also helps us synchronize views with variables very easily and efficiently. We don't have to write a lot of code to link our model with the interface. Property wrappers are essential in Swift UI development.
Conclusions
This article barely scratches the surface of SwiftUI, but now you have an idea of how to use some new Xcode tools to style and preview views, and how to use the @State and @Binding variables to keep your UI up to date. Also how to present alerts. Without a doubt, as time goes by SwiftUI will be the standard in development for iOS and Mac. You can only use SwiftUI starting with iOS 13 and MacOS X 10.15. This prevents the use of SwiftUI to create applications that already exist, but in a couple of years it will not be relevant. So we have the time to learn Swift UI until it becomes the standard of the iOS world.